What is Azure API Management (APIM)?
It’s a fully managed service provided by Microsoft Azure that enables you to publish, secure, and manage APIs for your organization. By acting as a gateway between your backend services and the clients that consume them, APIM provides a centralized point of control for your API ecosystem. With features such as rate limiting, authentication, caching, and analytics, APIM is an essential tool for modern application development and integration, especially in large-scale and distributed systems.
We can leverage the capabilities of Postman to automate the testing of APIs published in APIM using Azure DevOps
Before we dive into detail, we need to do a bit of prework.
Set up an APIM instance and create an API following the steps below:
- Deployed demo conference API as described in this exercise – Learn: Publish your first API.
- Added a dummy validate-jwt policy on the get sessions endpoint. This is to demonstrate valid JWT token generation using pre-request scripts from Postman. You can learn more about JWT policy here APIM Policy: Validate JWT.
Now that we have our demo API deployed with a dummy policy, let’s export it to Postman.
Export API to Postman from APIM
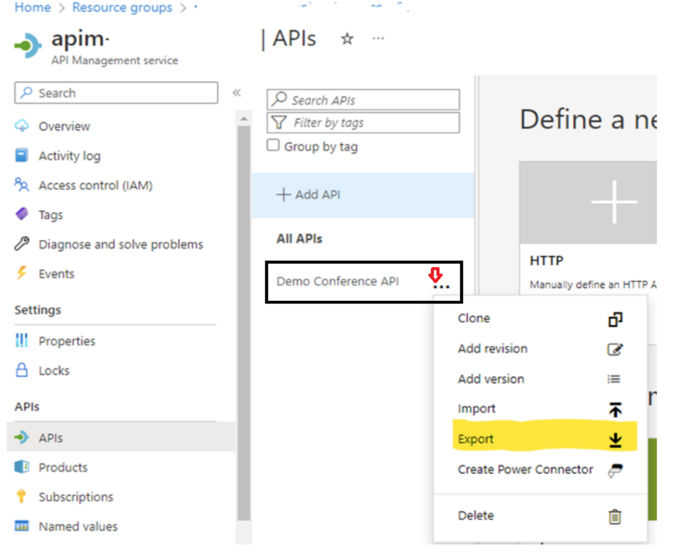
From the Azure Portal, select your API Management instance. From the left navigation of your APIM instance, select APIs and then select the Demo Conference API. Now click on export.
Once you’ve clicked on export, a popup like the one below will appear prompting for export targets.
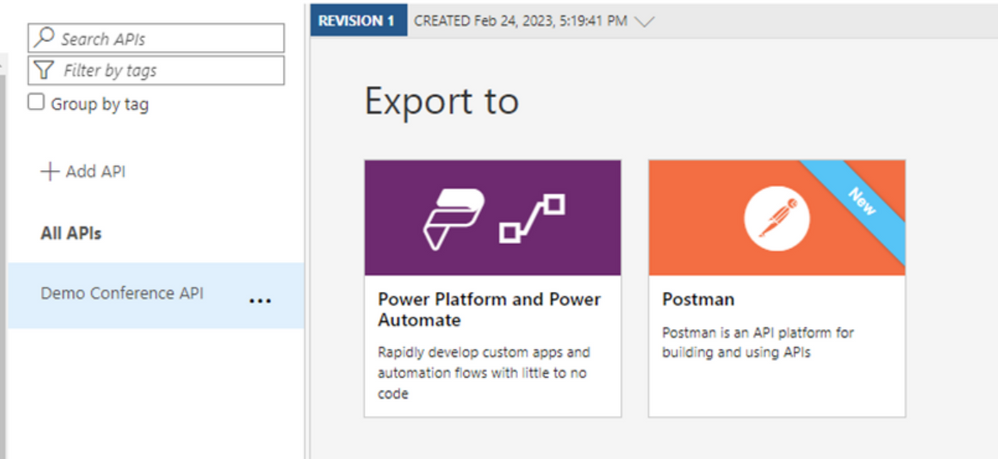
Select Postman here and you will get a pop-up to choose Postman for Web or Windows. Select as per your preference and this will prompt a dialogue in Postman to select a workspace.
Once the workspace is selected, import the API into Postman. There is also an option to create a collection at the same time and a few advanced options which you can see in the screenshot below.
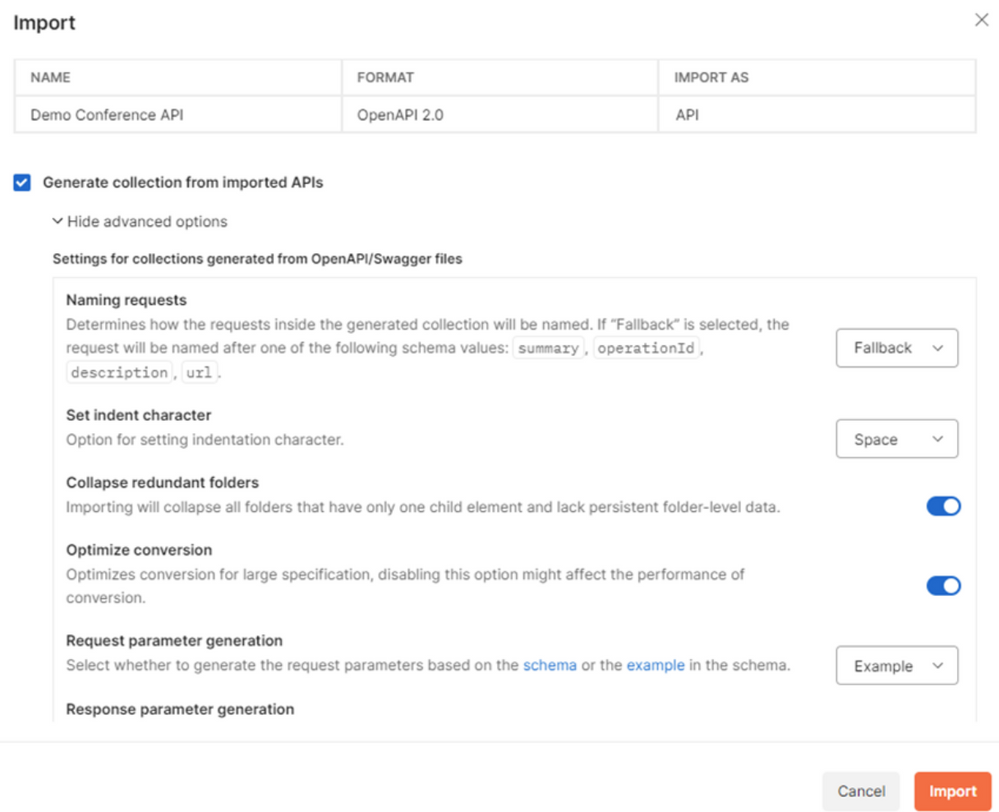
This completes the initial setup of the Postman collection, but it needs further configuration before exporting to Azure DevOps pipeline. Follow the next steps to complete the configuration.
Configure Postman Collection
In this example, we need to create required variables, set up pre-request steps & define tests.
- Create Variables – Here we are defining important variables to store and reuse values throughout this collection. There are several variables configured in this example as shown below:
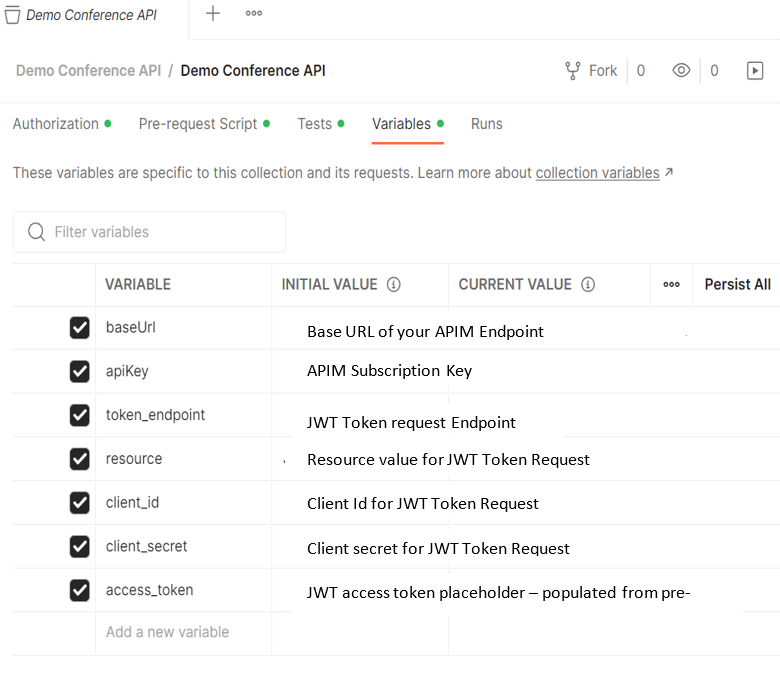
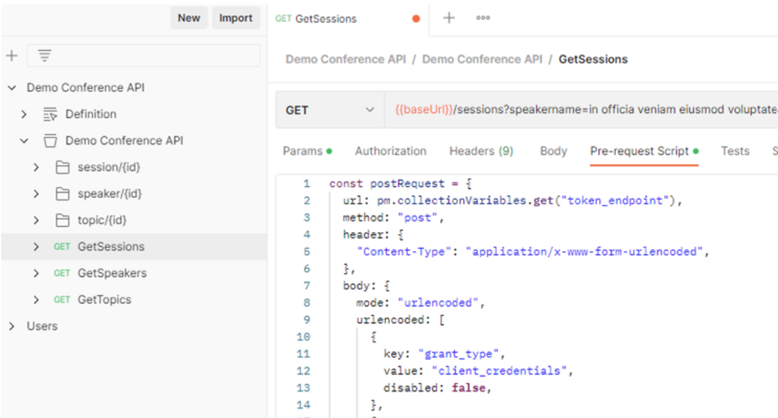
- Configure pre-request – Pre-request scripts in Postman execute Java scripts before an actual API request runs. Since our get-sessions endpoint has JWT validate policy defined, it expects a valid token passed in the request header. A pre-request step is defined to get a valid token. The script used is defined in this file DemoConfApi.JSON under GetSessions.
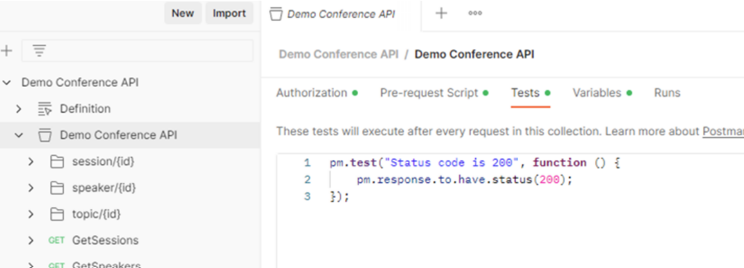
- Define Tests – The test configured in this example is checking if the API response status is 200. Additional tests can be easily added here, e.g. – tests to check response content, response time etc.
Once these configurations have been completed, it is a good idea to check everything is working as expected by running the tests in Postman. After making sure everything is working, export the collection in v2.1 format and save the JSON file.
Now we’re ready to create our DevOps pipeline to run the Postman Collection.
Create a DevOps Pipeline to run the Postman Collection
The exported JSON file from the previous step – Configure Postman Collection – contains the variables we have configured originally (baseUrl, apiKey, etc) and their values. For security reasons, it is not a good idea to have these sensitive values hardcoded as plain text in a file we are going to upload in DevOps Repo. Also, this prevents the reusability of the same collection across different environments since the values will change based on the environment.
To ensure security and reusability of the collection, follow the steps below:
- Create an Azure Key Vault and store all sensitive data as secrets in the key vault.
- Create a variable group in ADO and link the key vault to the variable group.
- Replace hard-coded values in the JSON file with placeholders. For example, the format ##….## (eg. ##apiKey##, ##baseUrl##, etc)
The placeholders in the JSON file will be later replaced with values from the ADO variable group you created in the step above during pipeline execution. We will make use of the command-line tool Newman to execute the exported collection from the ADO pipeline.
Now we have “prepared” the JSON file from Postman, let’s look at the steps required in the YAML pipeline definition to run this Postman collection.
- Install Newman using the command install newman -g
- Replace the token values in the Postman collection using qetza.replacetokens.replacetokens-task.replacetokens task and specifying the token prefix and suffix (##).
- Execute Newman command and specify the exported JSON collection as a parameter. e.g., newman run DemoConfApi.JSON -x -r junit –reporter-junit-export JUnitReport.xml. Please note that the -x flag will ignore the exit code and continue executing pipeline steps even after the test failures. If you want to stop the pipeline execution on test failure, remove this flag.
- Publish the test results using PublishTestResults task and pass the report from the previous step as a test result file.
You can take a look at the sample YAML pipeline definition here. This sample can be used to create a new ADO pipeline to test the demo conference API. In a real scenario, it’s good practice to create reusable YAML templates and refer to the templates from your pipeline definition.
Conclusion
Whilst this blog is targeted at Azure DevOps and APIM, you can use the same methodology to test any of your APIs if you set up a Postman collection. Additionally, you can automate the same testing process in GitHub actions. You can have a look at an example here. I have used GitHub environment secrets to store the sensitive data.
Automating API testing using Postman collection is easy. In addition, ADO provides a visual dashboard of your test results, which is easy to analyse. Overall, this approach delivers a rapid, traceable, reproducible testing methodology and it facilitates testing as part of your CI/CD process.
